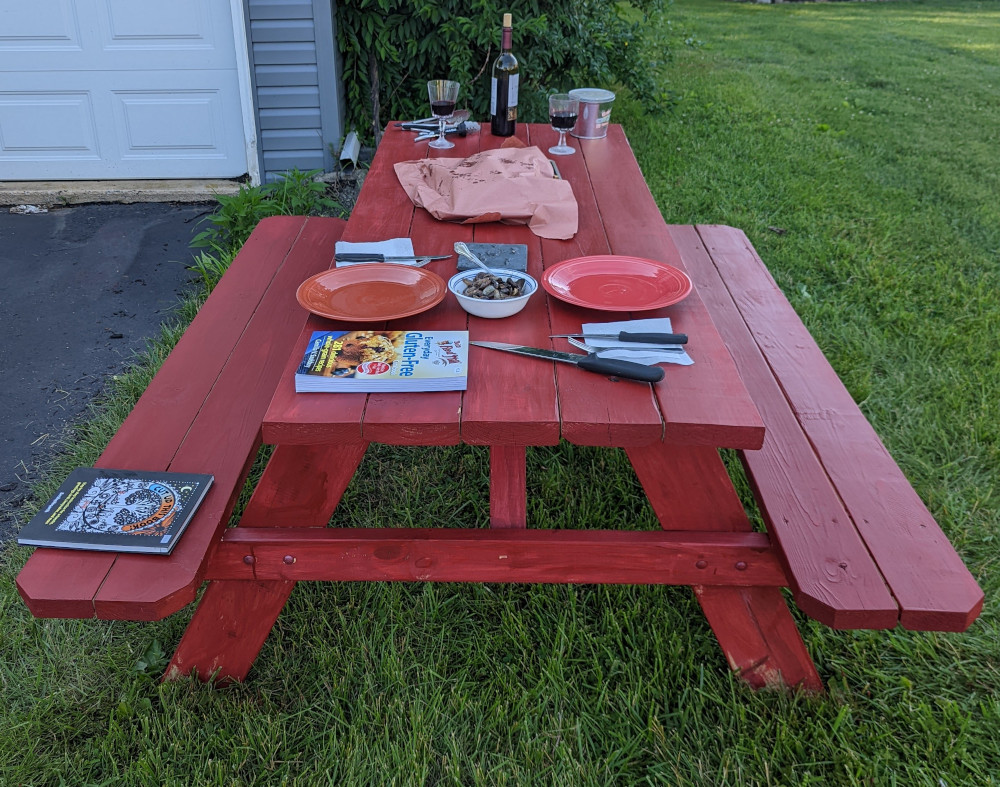
I bought a picnic bench to really enjoy the outside this summer. Over the last weekend, I picked up an unfinished wooden one from Lowe’s, and finished it myself. I got it for several reasons, and wanted to show it’s empirically better than any other patio furniture. I also just want to show off how good it looks in the yard.
The Reasons
- A picnic table seats many people and provides options. It’s not fixed by the number of chairs. It’s fixed by the number of people that can squeeze into it.
- It’s very easy to stain it any color I might want. I’m not limited by what the store has in stock.
- It’s made of heavy 2x4 and nice pressure treated wood. It will last many seasons if I apply a proper deck stain to it, and provide regular refreshers of the stain, it will be indestructible. No need to care about some cheap metal rusting or the glass getting filthy with pollen.
- I get a sense of pride and accomplishment cause I sanded and stained it myself.
- It is significantly cheaper than other patio furniture. I think it took me about 5 hours of work between transporting and staining it to get it the way I wanted it. Even with wood prices being what they are now due to the pandemic the total cost was around $250 with tax.
The Process
I like to grill a lot and I like to cook for other people. I also recently got a Blackstone griddle, but it was a lot of effort to take the cooked food inside from that when the weather is so nice out. Nothing is better than serving breakfast outside. I wanted a way for us all to eat outside and enjoy the weather. The logical answer is the picnic table.
Last weekend, I picked up a picnic table, and got the finishing material for it. I sanded it with 120 grit sand paper with my electric sander. I then applied 1 coat of stain to the top surfaces, flipped it and applied a coat to the bottom surfaces, making sure to soak the end grain of the wood in stain. I then flipped it back over and lightly sanded the flat surfaces with 120 grit again. I then wiped off the dust using a wet paper towel. Finally, I applied a 2nd coat of stain to the flat surfaces since that’s where the rain will likely collect. It took 1 qt of deck stain to cover the entire table.
I used these staining pads to apply the stain. They’re these foam sponges covered with some cotton. It worked really well to dip half of it in the stain and then wipe the wet end on the piece, and then clear the excess using the still dry portion of the sponge.

I had 2 options at the store, helmsman polyurethane or deck stain. I really don’t like working with polyurethane, because it requires a bit more skill to work, and it requires a base layer. Also I need to use a brush and mineral spirits to clean it. I would much rather use deck stain as it requires next to zero skill to use, and I can use a rag, and just rub it in.
If I were to do this again, I would probably start by using a hand place to clean up the top surface or some rougher sandpaper at the beginning like 80 grit to remove the lumberyard stamps. Also definitely splurge on the name brand sandpaper as it will last longer, and just remove material better.
Cost Break Down
To actually get it into place on my time, I had the following costs.
| Item | Cost |
|---|---|
| Picnic Table 6ft | $150 |
| Truck Rental | $22 |
| Red Deck Stain - 1qt. | $22 |
| Stain Pads | $6 |
| 120 Grit Sandpaper | $7 |
| Gloves | $5 |
| Subtotal | $212 |
| Tax | $13 |
| Total Cost | $225 |
Finished Product
Here we have the finished product of my labor. The table is set for dinner. I made some gorgeous tomahawk steaks on the smoker and some green beans for the side. We also had some wonderful mushrooms and onions. The wine was excellent, and the steak was fantastic. The green beans were wonderfully smokey too.
